This tutorial provides the PHP & JS codes that can be pasted in order to create a dynamic map with markers populated from a custom post type inside the Bricks Builder.
Table of Contents
- Requirements
- Add the Custom fields to your Custom Post
- Populate your store data
- The JavaScript
- Enqueue the scripts
- Bricks settings
- Conclusion
Requirements
- Bricks Builder (any version)
- Bricks Child Theme activated
- A Custom post type (in our example we’ll use
stores) - ACF Free or PRO installed
Add the Custom fields to your Custom Post
In our example, we’ll create a list of stores that we want to display on an interactive map. In order to do that, we’ll need add latitude and longitude to each store. Let’s do that using ACF:

Populate your store data
Let’s now jump inside our Custom post stores and add the list of the stores:
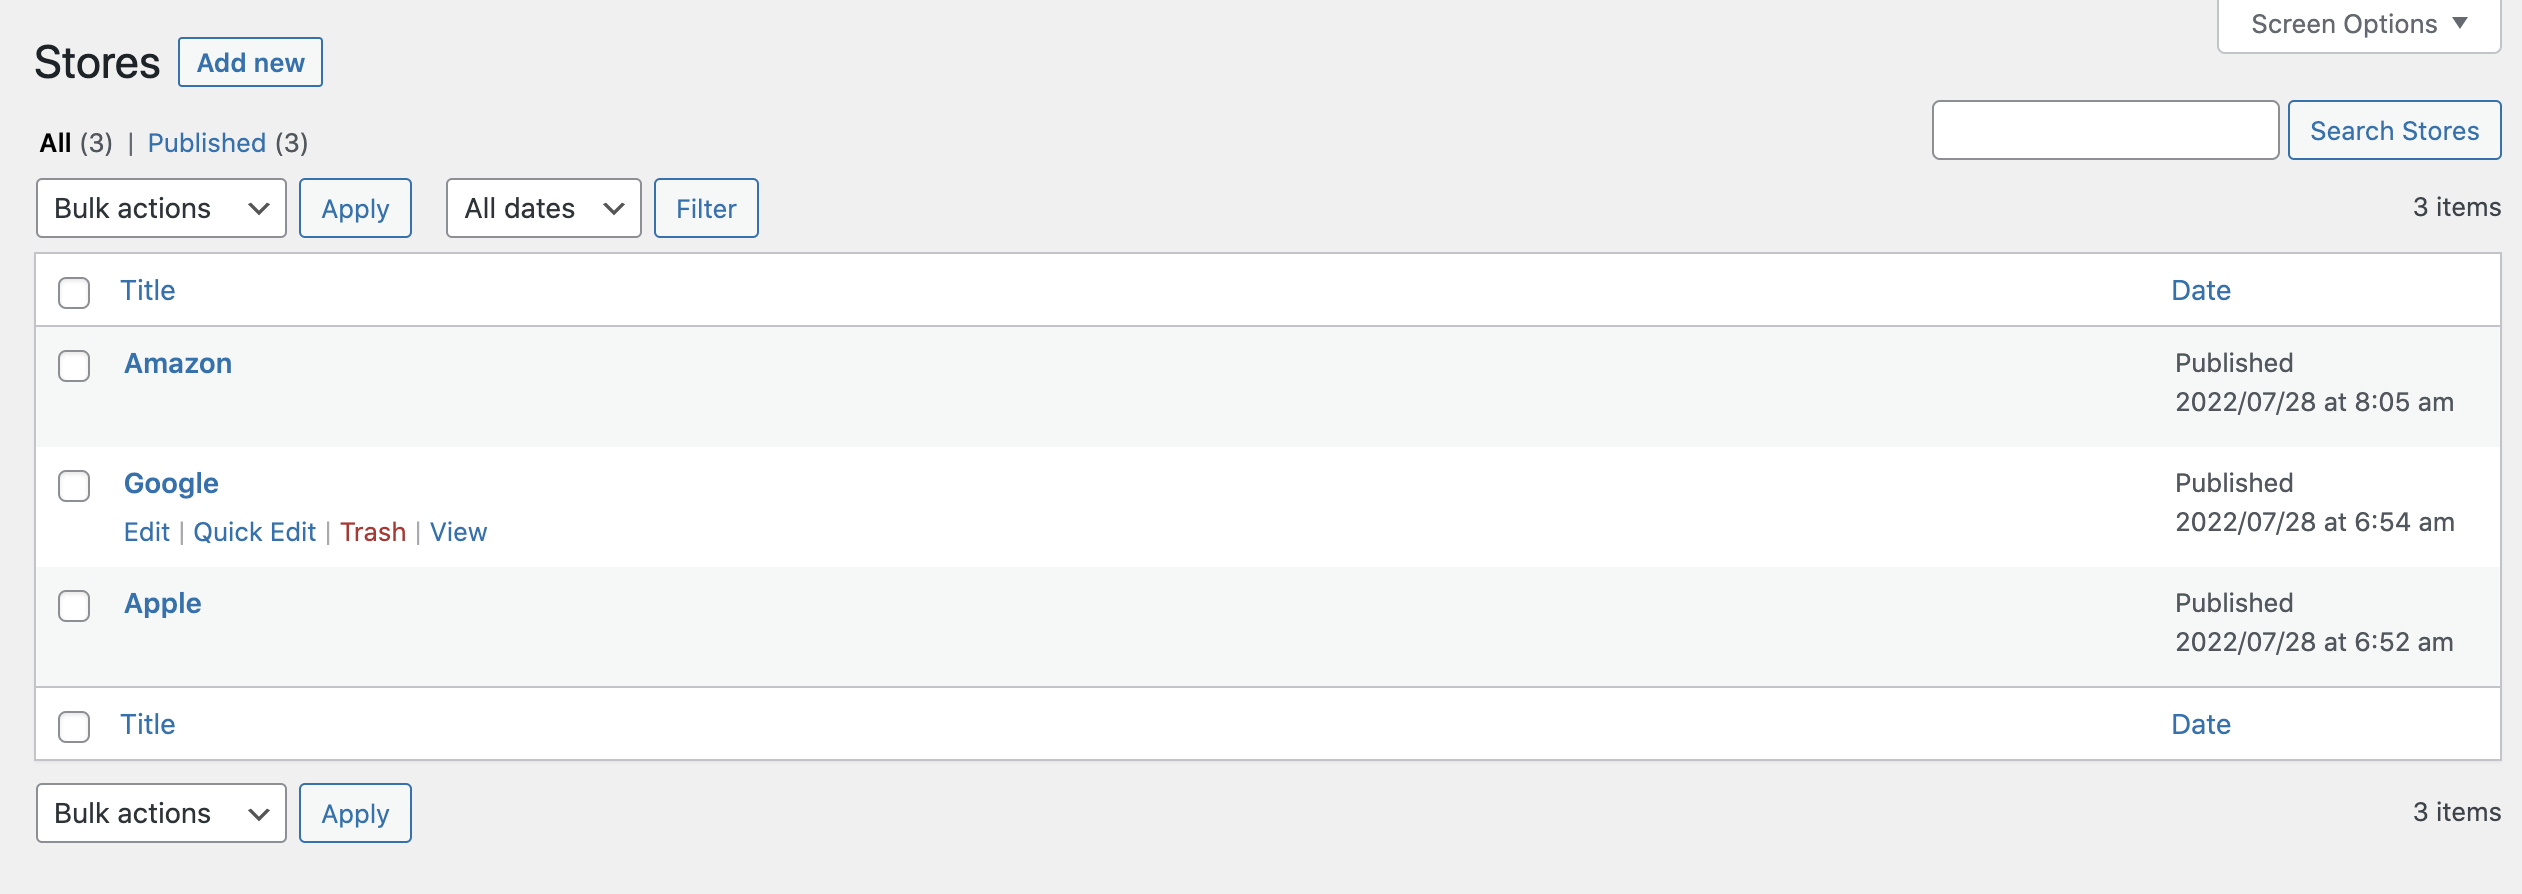
Let’s fill in the data for each store:

The JavaScript
For this tutorial, we’ll use Leaflet.js – an open-source JavaScript library for mobile-friendly interactive maps.
First of all, download the files from the author’s website and upload both the leaflet.js and leaflet.css files inside your child theme folder.
Let’s also create an init.js file where we’ll set all the map options. In our case, we created a file called leaflet_init.js and pasted the following code into it:
window.addEventListener('load', () => {
const canvas = document.querySelector('#map');
if (!document.body.classList.contains('bricks-is-frontend') || canvas === null ){
return;
}
var mbAttr = 'Map data © <a href="https://www.openstreetmap.org/copyright">OpenStreetMap</a> contributors, Imagery © <a href="https://www.mapbox.com/">Mapbox</a>';
var mbUrl = 'https://api.mapbox.com/styles/v1/{id}/tiles/{z}/{x}/{y}?access_token=pk.eyJ1IjoibWFwYm94IiwiYSI6ImNpejY4NXVycTA2emYycXBndHRqcmZ3N3gifQ.rJcFIG214AriISLbB6B5aw';
var streets = L.tileLayer(mbUrl, {id: 'mapbox/streets-v11', tileSize: 512, zoomOffset: -1, attribution: mbAttr});
var osm = L.tileLayer('https://{s}.tile.openstreetmap.org/{z}/{x}/{y}.png', {
maxZoom: 19,
attribution: '© <a href="http://www.openstreetmap.org/copyright">OpenStreetMap</a>'
});
var satellite = L.tileLayer(mbUrl, {id: 'mapbox/satellite-v9', tileSize: 512, zoomOffset: -1, attribution: mbAttr});
var map = L.map('map', {
center: [canvas.dataset.leafletLat, canvas.dataset.leafletLong],
zoom: canvas.dataset.leafletZoom,
layers: [osm, cities]
});
var baseLayers = {
'OpenStreetMap': osm,
'Streets': streets,
'Satellite': satellite
};
var layerControl = L.control.layers(baseLayers).addTo(map);
});Enqueue the scripts
Now let’s enqueue our files using the conditional method based on an ACF custom field. Open your functions.php file and paste the following code:
add_action( 'wp_enqueue_scripts', function ()
{
    // Enqueue your files on the canvas & frontend, not the builder panel. Otherwise custom CSS might affect builder)
    if ( !bricks_is_builder_main() && class_exists( 'ACF' ) )
    {
        // Leaflet
        if ( get_field( 'activate_leaflet' ) )
        {
            wp_enqueue_script( 'leaflet', get_stylesheet_directory_uri() . '/js/leaflet/leaflet.js', array() , '1.8.0' );
            wp_enqueue_style( 'leaflet', get_stylesheet_directory_uri() . '/css/leaflet/leaflet.css', '1.8.0' );
            wp_enqueue_script( 'leaflet_init', get_stylesheet_directory_uri() . '/js/leaflet_init.js', array( 'leaflet' ) , filemtime( get_stylesheet_directory() . '/js/leaflet_init.js' ) );

            $cities = "var cities = L.layerGroup();";

            // CUSTOM QUERY
            $args = array(
                'post_type' => 'stores',
                'posts_per_page' => '-1',
                'post_status' => 'publish'
            );
            $query = new WP_Query($args);

            // GET POST SETTINGS
            if ( $query->have_posts() ):
                while ( $query->have_posts() ):
                    $query->the_post();

                    // Variables
                    $id = get_the_ID();
                    $title = get_field( 'store_name' );
                    $address = get_field( 'store_address' );
                    $lat = get_field( 'store_lattitude' );
                    $long = get_field( 'store_longitude' );

                    // Add each store
                    $cities .= "var store" . $id . " = L.marker([" . esc_attr( $lat ) . "," . esc_attr( $long ) . "]) . bindPopup(`<a href=" . get_permalink() . "><h4>" . esc_attr( $title ) . "</h4></a><br>" . $address . "`).addTo(cities);";
                endwhile;
            endif;

            wp_reset_postdata();
            wp_add_inline_script( 'leaflet_init', $cities, 'before' );
        }
    }
});
As can see in the code above, we created a WP Query function to loop inside all our stores and retrieve all the data (such as store name, address, latitude, and longitude) and put it inside a JavaScript variable that will be used by Leaflet to populate the markers/popups into the map.
In this specific case, we’ll loop inside all published posts inside the stores custom post. If you need to further filter the data (for example: by taxonomy, authors, or meta_key), feel free to modify the $args parameters of the WP Query to fit your needs.
Bricks settings
Now let’s insert the map inside the builder. To do that, we need to create a div and change the ID to map:

Then we need to specify the width and height:

And finally, create some data-attributes to correctly position the map:

data-leaflet-zoomis the default zoom level or our map on load. In our example, we set it to 6.data-leaflet-latis the default latitude of the map on load. In our example, we set it to 37.4532775.data-leaflet-longis the default longitude of the map on load. In our example, we set it to -81.2703729.
Conclusion
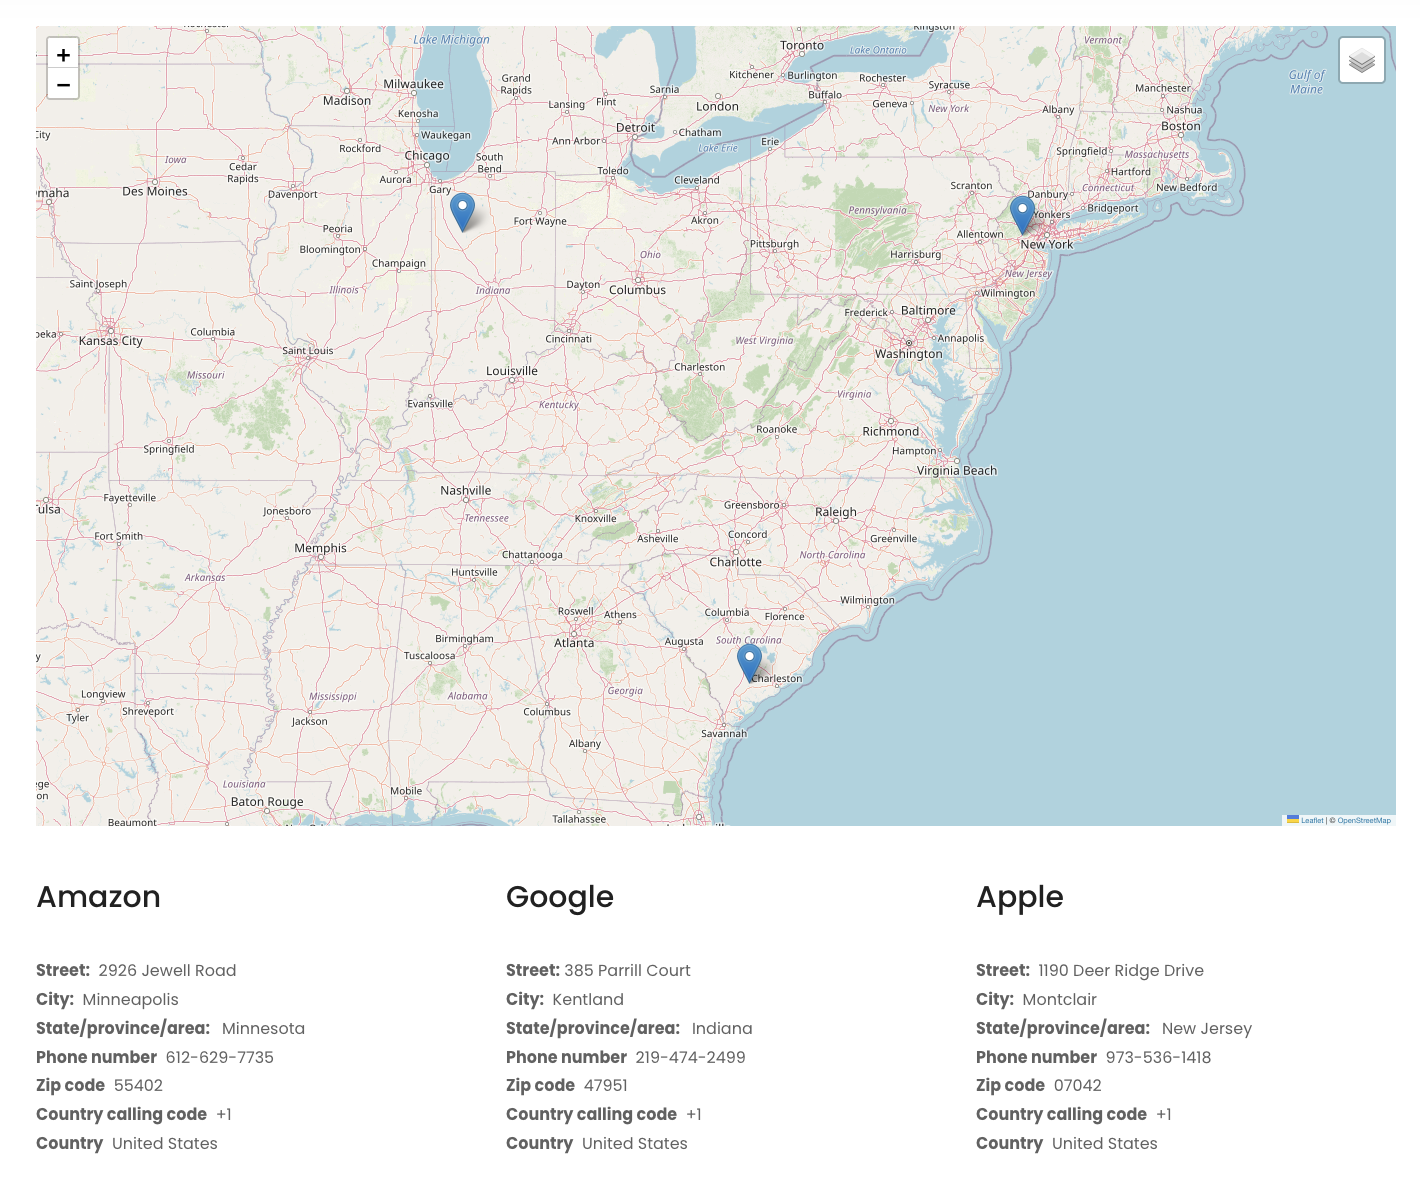
If everything worked correctly, you should now see the interactive map on the frontend with the correct markups populated from our Stores custom post.
See you soon for a new tutorial!