This is a fairly long tutorial that goes in-depth.
If you are a visual learner, you may want to wait for upcoming video by Paul C to see his take on this.
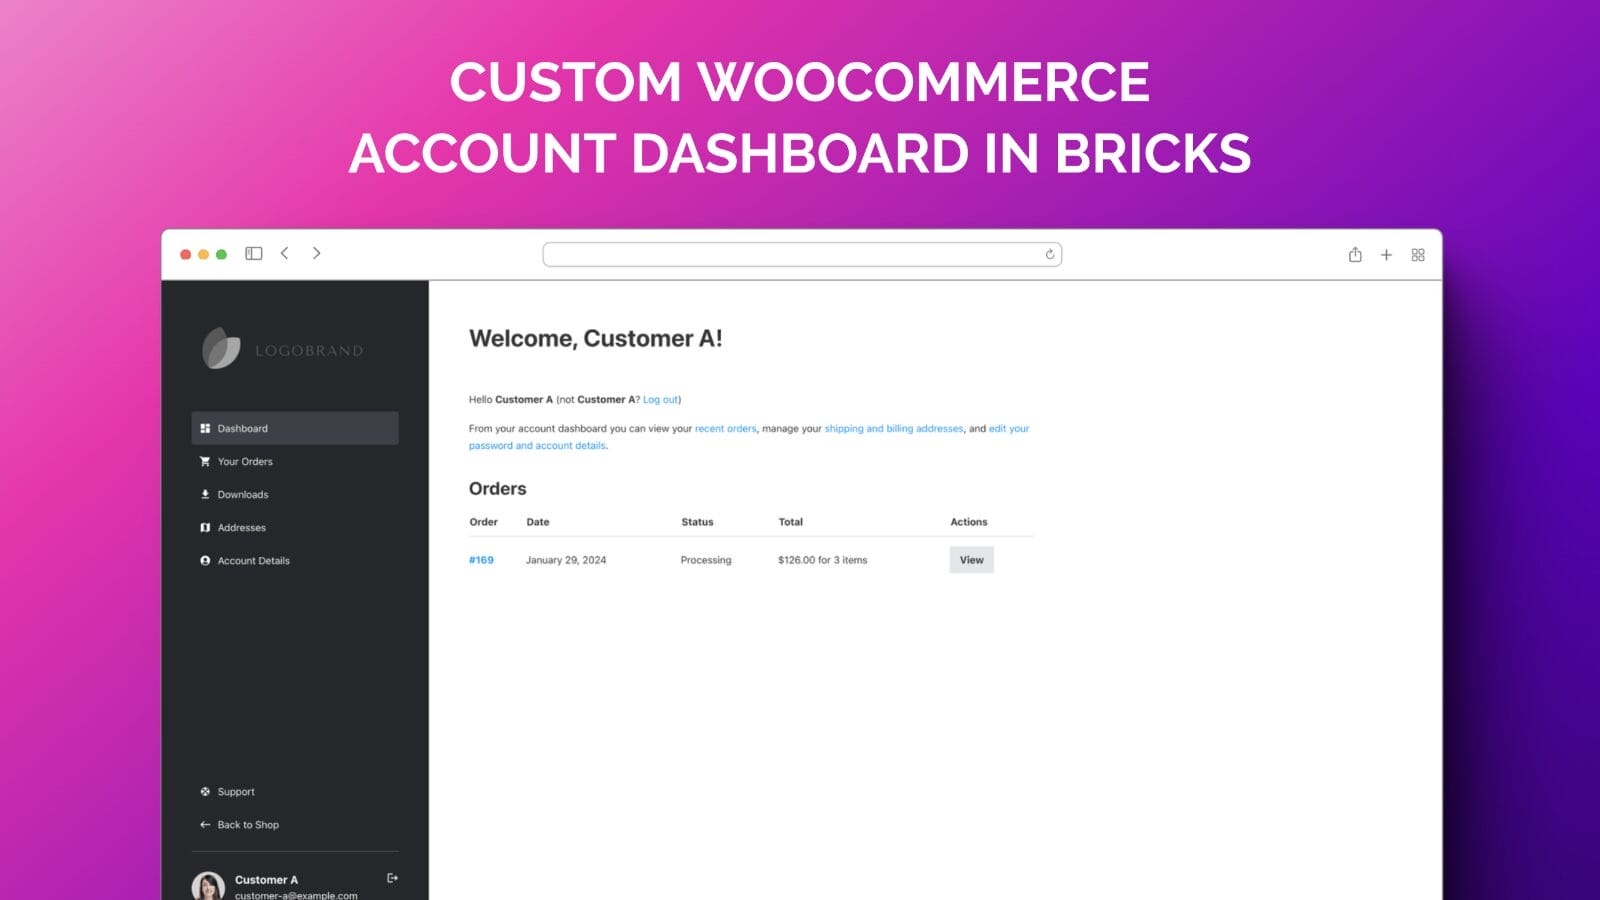
For reference, the My account page looks like this by default:
Table of Contents
Step 1
For showing WooCommerce notices at the top of right column, we need to first go to Bricks → Settings → WooCommerce and toggle Enable Bricks WooCommerce “Notice” element.
Step 2 – My account Page
Go to the Pages list and edit My account with Bricks.
This is the Page in which we build the overall structure of a fixed left column and scrollable right content column. In other words, this is our dashboard page.
When you are done, it should look like this:
If you’d like to import this Page so you can have a head start for further tweaking rather than building it from scratch, here’s a Zippy export. You’d still need to do the “Removing WooCommerce MyAccount Navigation” part detailed further below.
Manual instructions follow.
Click the Settings (gear) icon → GENERAL.
Disable header and footer.
Click the Layout icon and select 33 | 67 layout.
This adds a Container with 2 Columns.
Align cross axis: Stretch.
Width: 100% Height: 100vh
Right click on the Container and wrap it in a Section.
You probably have padding values for all sections set via a global theme style. Unset it for this Section by setting padding on all sides to 0.
Left column
Select the 1st Column.
Padding on all sides: 3em
Max. width: 400
Color: #f5f5f5
Background color: #26272a
Add a Logo element and select/upload your desired logo image.
Margin at the bottom: 2em
Next, we shall add a series of Text Link elements, one for each account nav item.
Add a Text Link element.
Text: Dashboard
Link to: Internal → My account (Page)
Click Icon and upload a svg icon like this one (Select 18dp size and White color for this and all subsequent icons). If you are unable to upload SVGs in the Bricks editor, enable it for Administrators in Bricks’ General settings.
Add a class of say, wc-nav-link.
With this class selected, set icon Gap to 10.
Padding on top and bottom: 0.8em Padding on left and right: 0.75em
Width: 100%
Color: #f5f5f5
Border radius: 4 on all sides
Activate the hover state and set color to #fff.
Deactivate the hover state.
Duplicate the Text Link and change it to Orders.
You could set this to be either a static value of /my-account/orders/ or dynamic.
You may already have a specific color for links set in a global theme style.
To ensure that it applies to all links within our custom dashboard, add the following in child theme‘s functions.php (w/o the opening PHP tag) or a code snippets plugin:
<?phpadd_filter( 'bricks/link_css_selectors', function( $link_css_selectors ) {
// Add CSS link styles to .brxe-woocommerce-account-page a$link_css_selectors[] = '.brxe-woocommerce-account-page a';
return$link_css_selectors; // Array of selectors link styles are applied to
} );
Custom CSS
Let’s add a bit of CSS to make the current/active custom link stand out by setting it a background color and to set bottom margins for h2 and h3 headings on this page.
For the Column element, set a Padding of 4em on all sides, Max. width (if you want to) of 966, and Overflow to auto.
Add a Notice element.
Add a Account – Page element.
Every WooCommerce Account endpoint like Addresses, Downloads, and Orders is rendered inside this “Account – Page” element using the corresponding Bricks template (if present).
Reference:
Template type
Endpoint
Element
WooCommerce – Account – Dashboard
/
–
WooCommerce – Account – Orders
orders/
Account – Orders
WooCommerce – Account – View order
orders/view-order/{order_id}/
Account – View order
WooCommerce – Account – Downloads
downloads/
Account – Downloads
WooCommerce – Account – Addresses
edit-address/
Account – Addresses
WooCommerce – Account – Edit address
edit-address/billing/ edit-address/shipping/
Account – Edit address
WooCommerce – Account – Edit account
edit-account/
Account – Edit account
Removing WooCommerce MyAccount Navigation
By default a light gray background navigation with default WooCommerce account links appears when this element is added.
Since we are building the nav links individually for full control, let’s get rid of this unwanted default navigation.
Install and activate the Bricks child theme if you don’t already. It is safe to do at any stage of the site.
By default, the orders table will appear at /my-account/orders/.
If you’d like to add any elements above or below, implement this step.
Go to Bricks → Templates.
Either import this template or add a new one of the type “WooCommerce – Account – Orders” with the same or a similar name.
If you have imported the template, ensure that its type is set correctly. Edit it with Bricks and disable header and footer. Right click on the “WooCommerce Account Orders” element and save it as a global element. This is needed for the next step (if you’d like to add the Orders table in the dashboard).
If you want to set this up manually:
Edit the template with Bricks.
Disable header and footer in PAGE SETTINGS.
Add a h1 Heading that reads say, “Your Orders”.
Margin at the bottom: 1.5em
Add a WooCommerce Account Orders element. Right click on it in the structure panel and save it as a global element. This is needed for the next step (if you’d like to add the Orders table in the dashboard).
Step 4 – WooCommerce Account Dashboard template
Out of the box, the dashboard shows:
If you’d like to edit that by adding say, a heading above and the Orders table below, implement this step.
Go to Bricks → Templates.
Add a new one of type “WooCommerce – Account – Dashboard” with the same or a similar name.
Edit it with Bricks.
Disable header and footer.
Add a h1 Heading with this text:
Welcome, {wp_user_display_name}!
Margin at the bottom: 1.5em
Add a Basic Text element with a HTML tag of p having:
This file contains bidirectional Unicode text that may be interpreted or compiled differently than what appears below. To review, open the file in an editor that reveals hidden Unicode characters. Learn more about bidirectional Unicode characters
Add another Basic Text element with a HTML tag of p having:
This file contains bidirectional Unicode text that may be interpreted or compiled differently than what appears below. To review, open the file in an editor that reveals hidden Unicode characters. Learn more about bidirectional Unicode characters
From your account dashboard you can view your <a href=»/my-account/orders/»>recent orders</a>, manage your <a href=»/my-account/edit-address/»>shipping and billing addresses</a>, and <a href=»/my-account/edit-account/»>edit your password and account details</a>.
Note: If you are comfortable with hooks and want to make simple changes like adding a heading above the default output, you could alternatively simply do without creating a Bricks template:
add_action( 'woocommerce_edit_account_form_start', function () {
	echo '<h1>Account Details</h1>';
});