
Updated on 5 Apr 2024
This Pro tutorial provides the steps to trigger a click on the first image of a gallery in Bricks when a button is clicked.
We are going to set a fixed height for the gallery with overflow: hidden so that only a few images will be shown and the user can either click on any of the images or on the “View All Photos” button and browse all of them in the lightbox.
Step 1
Edit your Template/Page with Bricks.
Add a Section.
Set Section’s Container’s position to relative.
Add a Image Gallery element inside the Section’s container.
Select/upload your desired images or if you have a ACF Gallery field or Meta Box Advanced Image field set up, select it as the source of images.

Link to: Lightbox.
STYLE → LAYOUT: Set a Max. height (534px in my test site).
Overflow: hidden
Step 2
Add a Button element below the Image Gallery.
Position: Absolute
Right: 10px
Bottom: 10px
Step 3
Click on the Settings (gear) icon → PAGE SETTINGS → CUSTOM CODE and paste the following under Body (footer) scripts:
<script>
document.addEventListener('DOMContentLoaded', () => {
  const button = document.getElementById('brxe-xhppyi');
  const prevSibling = button.previousElementSibling;
  const firstItem = prevSibling.querySelector('.bricks-layout-inner');
  button.addEventListener('click', (e) => {
    e.preventDefault();

    firstItem.click();
  });
});
</script>
Replace brxe-xhppyi with the ID of your button.
That’s it.
Notes
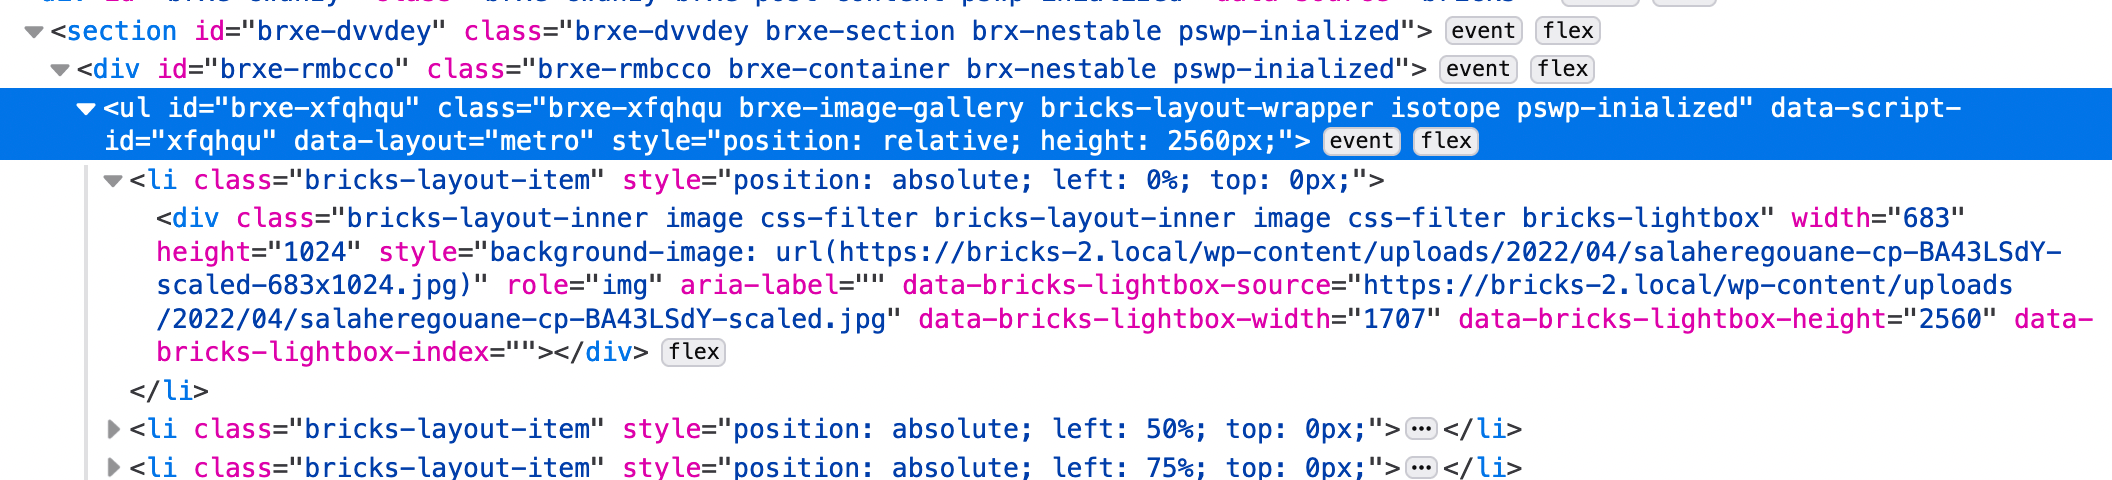
Inspecting the gallery with Firefox (Developer Editor) DevTools we can see an event for the ul (the gallery element).
Clicking on event shows:

Clicking on Bubbling shows:

As we can see, the lightbox gets initialized when the clicked element has a class of bricks-lightbox.
This class is present for the divs inside the lis.
This click event bubbles up from the clicked div to its parent li and from here to the li‘s parent ul.
This means we need to get a reference to the div element that’s inside the first li and in its click handler, run click().
This is the logic behind the JS code.