This Pro tutorial provides the steps to show a “Pro” ribbon for posts that are categorized under the “Pro” category when using Bricks builder.

Step 1
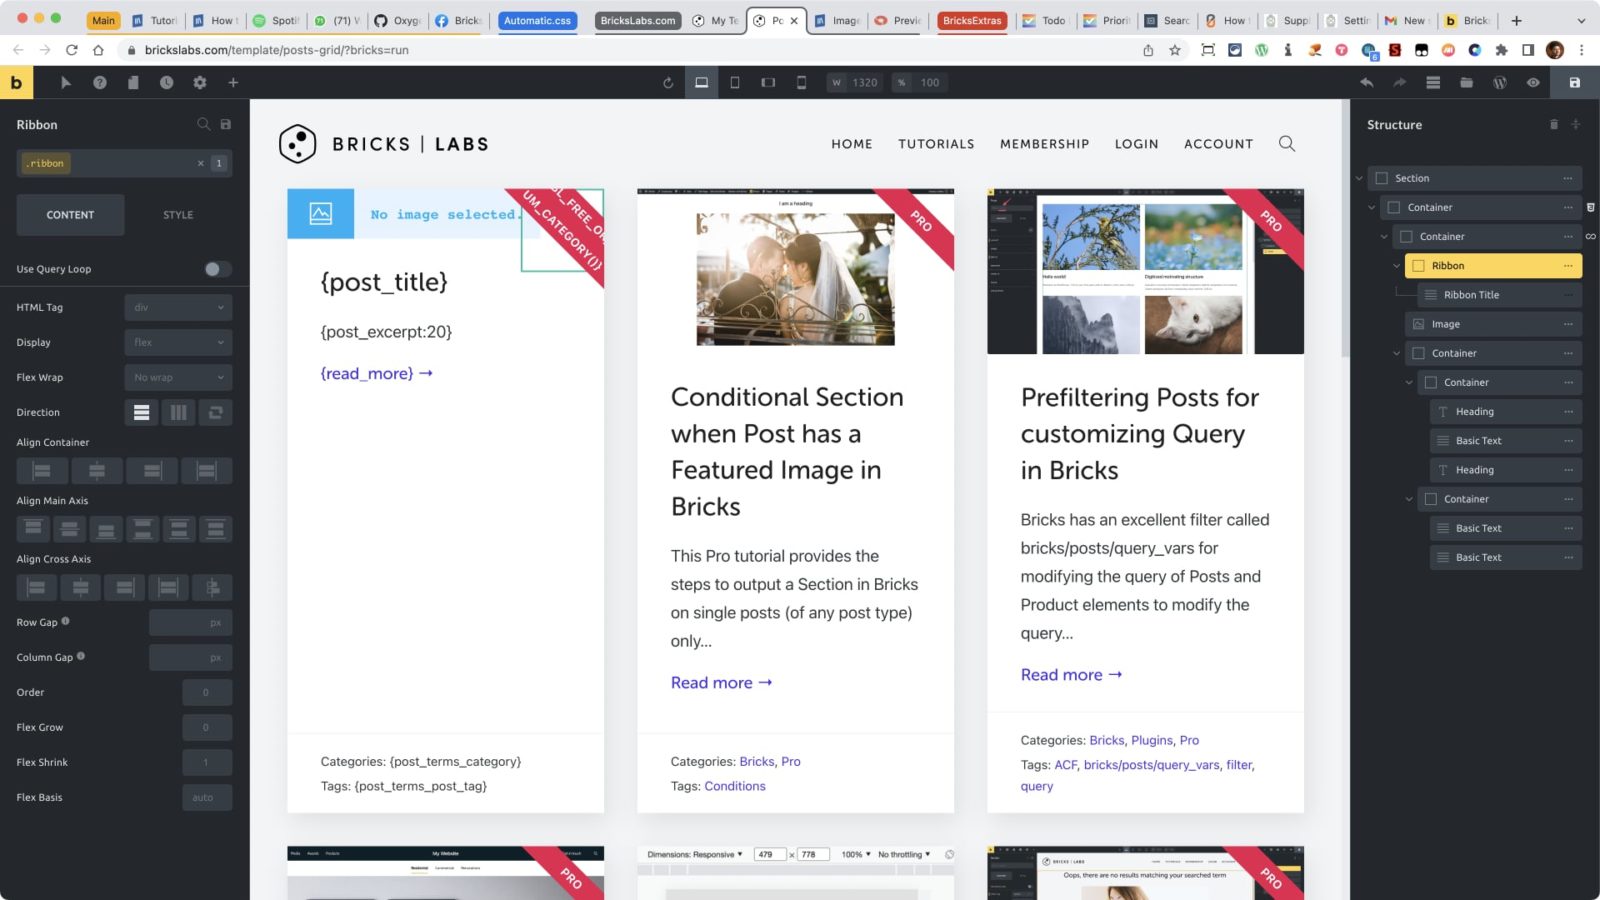
Add a Section having a Container.
Add a Container element inside.
Toggle “Use Query Loop” on.
Click on the Query icon and configure your WP query.
Add a Container inside the above Container and rename it to say, “Ribbon”. Give it a class of ribbon.
Add a Heading inside the Container. Rename it to say, “Ribbon Title”. Give it a class of ribbon__title.
Step 2
Add the following in your child theme’s functions.php:
/**
 * Function to check if the current post is assigned to Pro category
 * @return string "Pro" or an empty string
 */
function bl_is_pro_category() {
	return in_category( 'pro' ) ? 'Pro' : '';
}
Step 3
Back in the editor, select the Ribbon Title and set the content to:
Change the HTML tag to div.
Add your desired elements like a featured image, post title and post excerpt alongside (at the same nesting level) as the Ribbon element.
Step 4
Add the following in child theme’s style.css:
/* --- Ribbon --- */

.ribbon {
  width: 100px;
  height: 100px;
  position: absolute;
  right: 0;
  z-index: 2;
  transform: rotate(90deg);
}

.ribbon__title {
  font-size: 14px;
  margin-top: 39px;
  width: 200% !important;
  color: #fff;
  text-align: center;
  font-weight: 700;
  line-height: 30px;
  letter-spacing: 0.25px;
  background-color: #e70d4f;
  transform: translateY(-50%) translateX(-50%) translateX(39px) rotate(-45deg);
  max-width: none;
  text-transform: uppercase;
}